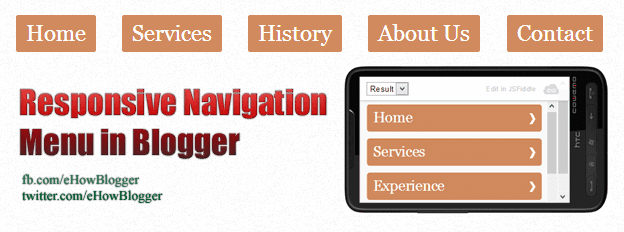
Responsive Web Design (RWD) is aimed to optimize your website for not for only desktop browsers as well as mobile and other devices for optimal user experience. Now a days, Responsive Web Designing is trending world wide and year 2013 is said to be a year of responsive designing. The use of hand held devices mobile phones, tablets etc. is increasing and people around the world are like to surf online on these devices. First step toward Responsive Designing is to create a responsive navigation menu. Menu below is created by using CSS media queries.
Adding Menu to Blogger
- Sign in to Blogger
- Click on Layout tab
- Now, Add HTML/JavaScript Widget and paste the following code inside
<ul id="nav">
<li class="current"><a href="/" title="Home" >Home</a></li>
<li><a href="#" >Services</a></li>
<li><a href="#" >History</a></li>
<li><a href="#" >About Us</a></li>
<li><a href="#" >Contact</a></li>
</ul>
<style>
#nav { margin: 0; padding-top: 0.85em; width: auto; font-family:'Alegreya SC', Georgia, serif; font-size: 1.4em; }
#nav li { margin: 0 0 0.5em 0; display: block; float: left; clear: none; margin-right: 2.5%; background:#d18b5e; -moz-border-radius: 2px; -webkit-border-radius: 2px; border-radius: 2px; padding:5px 10px 5px 10px;}
#nav li:last-child { margin-right: 0; }
#nav a { display: block; color: #FFF; text-decoration:none; }
#nav a:hover { color: #484a50; border-bottom-color: #484a50; }
@media only screen and (max-width: 767px) {
#nav .current{background:#666; -moz-border-radius: 5px; -webkit-border-radius: 5px; border-radius: 5px; background:none; }
#nav { margin: 0 6% 0 0; padding: 0; }
#nav li { margin: 0; display: block; float: left; width: 100%; clear: none; background:none; }
#nav a { padding: 6px 0 8px; text-indent: 10px; color: #fff; background: rgba(194,100,40,0.75) url(https://blogger.googleusercontent.com/img/b/R29vZ2xl/AVvXsEj0LxG5N0AfxzUNy92XihwMLu6pCA2P73NF_WCJFx8fjz6V407zdhK8YglFb2wH_IYpkl29p-NEdRvBUuXy-HWjlspCJHn70A0VrLTmtO0rlFG5NPYSvAsK3j09VV_z7K4Zj4Ffmqv92YE/s1600/bg_arrow_white.png) 96% 50% no-repeat; border-top: 1px solid rgb(194,100,40); -moz-border-radius: 5px; -webkit-border-radius: 5px; border-radius: 5px; }
#nav a:hover { border-bottom: none; }
</style>
- Finally, save your widget.
Adding Meta Tags
Add meta tag to your template in order to control layout on mobile devices. An mobile-optimized website has this type of meta tags. Follow step by step instructions to add this meta tags in blogger blog:-- Go to Blogger Dashboard
- Click on Template tab
- Now, Click HTML> Proceed
- Find in your template and paste following code above it
<meta name="viewport" content="width=device-width, initial-scale=1, maximum-scale=1.0, user-scalable=no"/>
Need Help?
If you are facing any problem, feel free to ask.Write below in comments for quick reply.
Get Latest Updates

usefull articals
ReplyDeletewww.puthiyatamil.net
Dear sir I want to install coral x4 plz help me .....
ReplyDelete